The 5 Steps of Product Design Ideation

Every product you use in your home, see on store shelves, or manufacture in your shop began its life as just an idea. While we all love to think of these fantastic inventions and brilliant ideas as lightning-flash, light-bulb moments of pure inspiration, the truth is that developing brilliant and functional products is a process. Does that make it any less magical? We don’t think so. We believe that the creative journey that makes up the ideation process steps and product ideation framework is one of the most powerful tools in invention and design.
With that in mind, we thought we’d share a brief guide to what we see as the five ideation process steps to help anyone start developing game-changing ideas, even if they have nothing more than a notepad and a pen.
5 Steps to Product Ideation
Step 1: Find a Direction for Your Product
You’re sitting in a chair in an empty room, and bam! Suddenly you come up with the perfect idea for a low-profile tea kettle and coffee-maker combo that will transform the mornings of millions of people everywhere.
Ideas don’t tend to work quite like that. Generally, you need a spark that comes from the world around you. This step is the unofficial beginning of the ideation process steps.
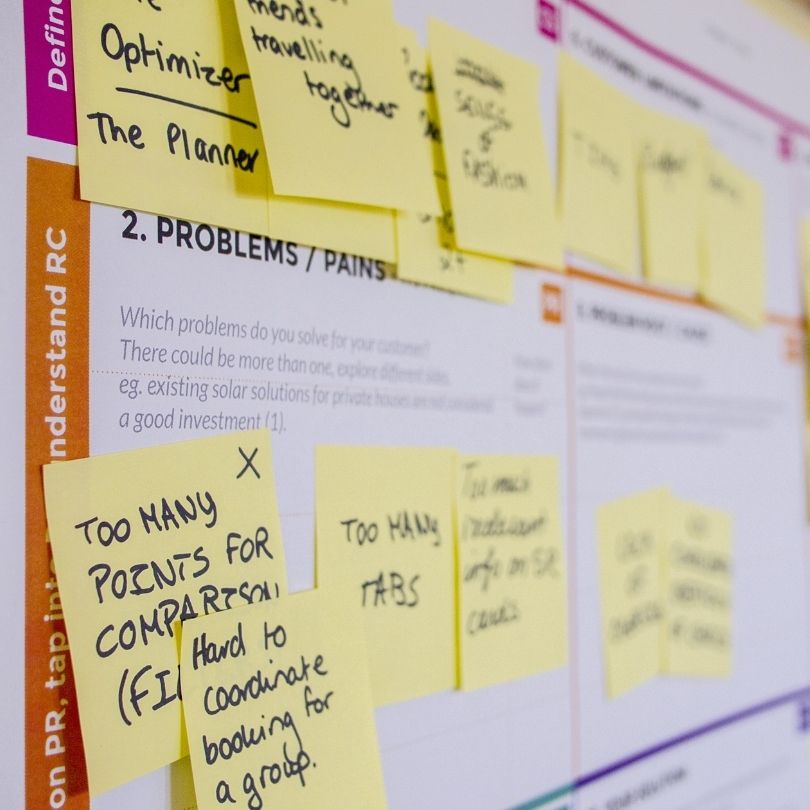
Finding that spark doesn’t just require lots of time pondering in a room. It means observing the world around you, seeking out moments in everyday life that could be improved, simplified, or made more enjoyable. Talk to people that use products that interest you. What do they do well? What do they do poorly?
Once you’ve identified one or a few of these moments, you’ve laid the foundation for the product ideation framework.
Step 2: Develop Customer Personas
You might have discovered a potential product that will change the lives of millions of people. But focusing on meeting the needs of millions of people can lead to a lack of focus and inspiration.
That’s why at Beyond Design and other design firms, we focus instead on just a few people. Hypothetical people, that is.
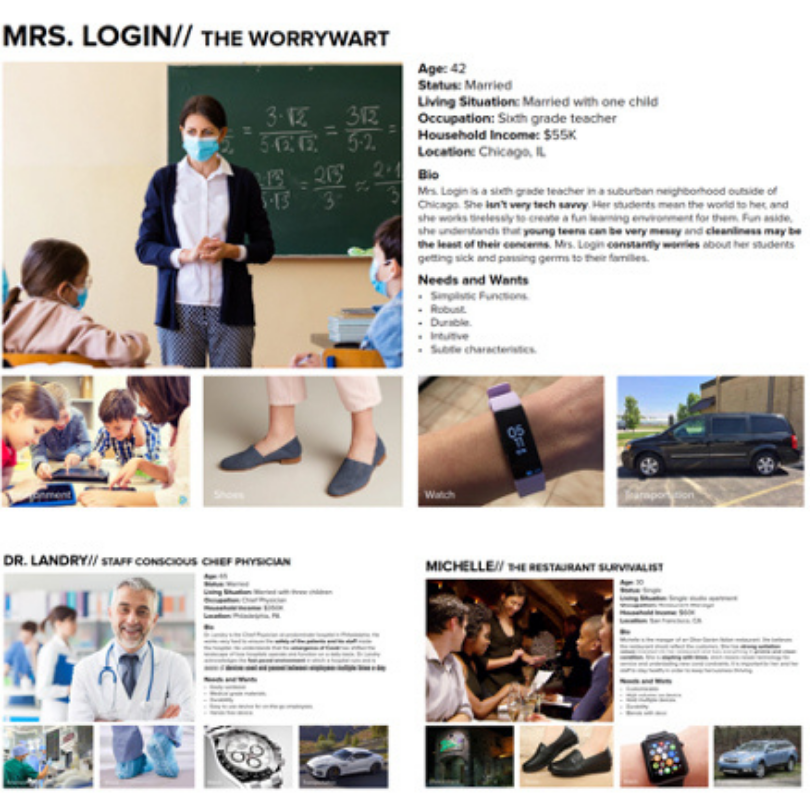
A customer persona is essentially an imaginary person (or couple, or family) who represents the ideal audience and customer for your product.
For example, let’s go back to our low-profile coffee maker concept. You might develop a customer persona of a young couple living in a small urban apartment where space is at a premium. They want a way that he can enjoy his morning tea and she can enjoy her morning coffee using the same space-saving device that’s easy and fast to use and clean, because they’re both busy with full-time jobs.
See how you’ve taken a vague, impersonal market and made it personal? Creating detailed customer personas help you identify specific problems that real people may have, and then finding solutions to those problems. It focuses your efforts and helps give you momentum and direction during your product ideation process.
Step 3: Build Image Boards for Your Idea
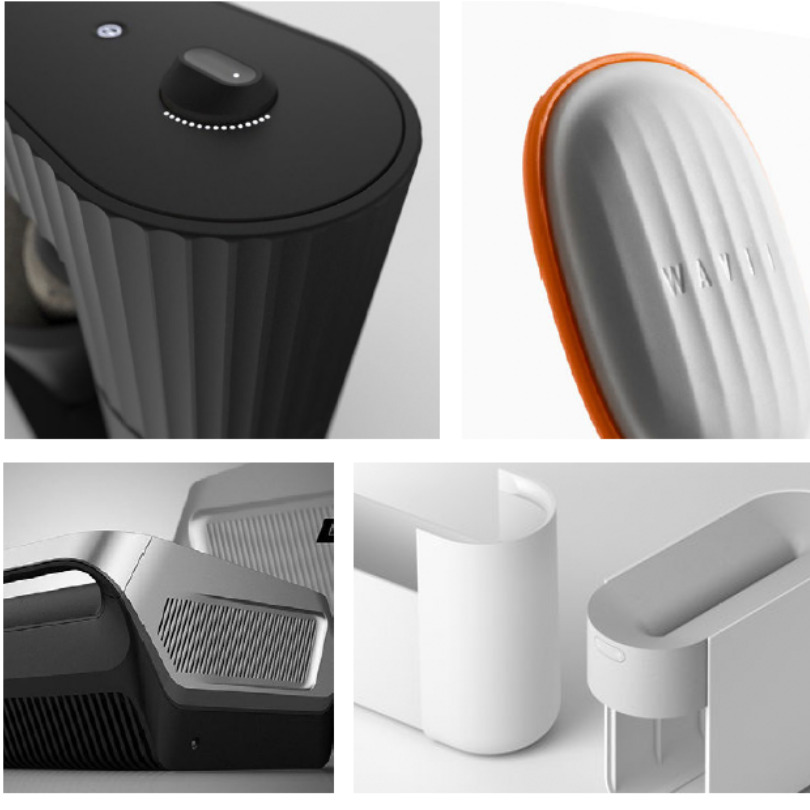
The third ideation process step is to begin visualizing your product. But it may not be time to pull out the sketchbook quite yet. Sometimes it can be very helpful to create image boards. An imageboard is a sort of collage of existing products, designs, and even shapes that will serve as inspiration for your product’s design. Anything that will help guide your design process can go on these imageboards. This is the time to take in Inputs, the ideas, concepts, and products that will inspire you, before starting to develop your Output, the design itself.
Step 4: Start Sketching Your Design
You’ve found your spark. You’ve developed a persona (or several). You’ve built image boards for inspiration. Now it’s time to start sketching out your product. We use the term sketching generally— it might mean actually sketching with a pencil in your notebook, but it also might mean developing ideas in list form, or working on a digital device. There are some excellent sketching tools often used at Beyond Design. One of them is a sketching or product design tablet, like those developed by Wacom. Another tool is the software called Sketchbook Pro.
Sketchbook Pro
Sketchbook is a software platform built for both PC and mobile devices that allows for everything from quick sketches of ideas to fully finished artwork and designs. It’s built to be quickly accessible for whenever inspiration strikes, making sketching fast, intuitive, and easy to master.
Types of Sketches: Orthographic vs. Perspective
When it comes to product ideation, there are two types of sketches that can be useful— orthographic and perspective.
Orthographic Sketches
Orthographic sketches are images that appear as if the product is flat. They’re drawn straight-on, without detailed effort to make them appear three-dimensional. These sketches are helpful for quickly getting ideas down for basic shape, design, and size. They don’t require lots of detail and artistic work that can be time-consuming and take you out of the fast-paced process of capturing ideas.
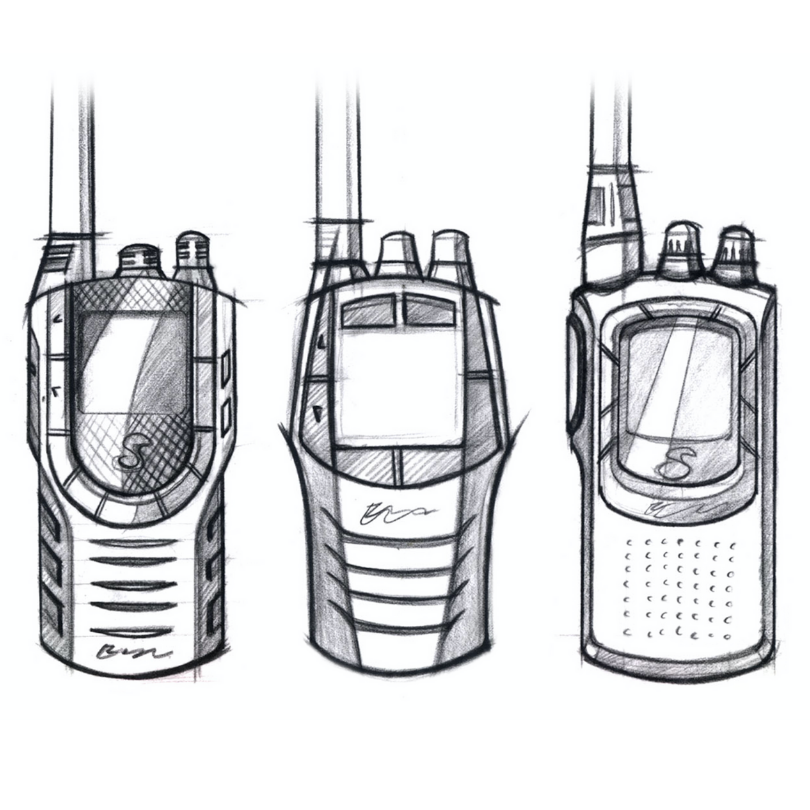
Perspective Sketches
Then there are perspective sketches, which are more detailed, appear three-dimensional, and provide a more complete and realistic image of what the finished project may look like.
Both orthographic and perspective sketches are useful at different parts of the ideation process, and both can be used as part of the product ideation steps.
Step 5: Refine and Improve Your Product Design
Once you’ve sketched out some basic designs, it’s time to start refining and improving these designs. This process can include garnering feedback from trusted sources, revising your ideas, adding or removing features, and more. It’s all about taking your product from a loosely sketched idea to something that’s beginning to resemble a product that could be made in the real world.
Once you’ve refined and improved on your initial idea, you’re ready to move on from the ideation phase to the prototyping phase.
Want to discover how we create award-winning and transformative industrial designs at Beyond Design? Visit our blog to learn more.
 Top
Top